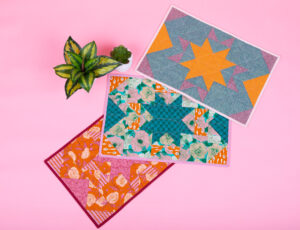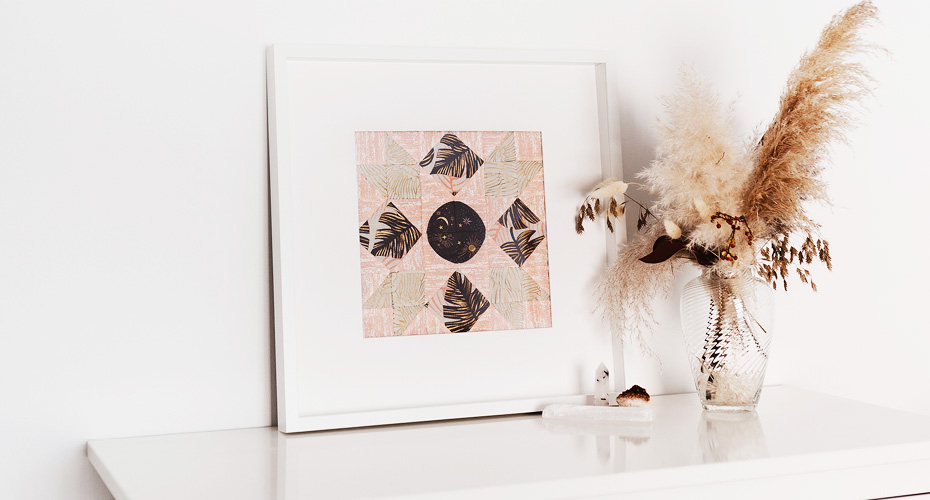
Learn about 3 basic quilting techniques by making this quilt block I’ve created for you!
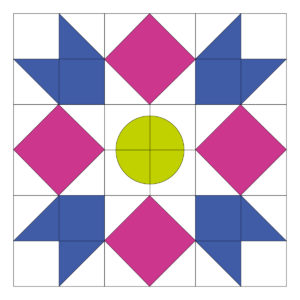
Just repeat the block multiple times, and you’ll end up with a nice quilt! You could also use it as a framed home decor, on a cushion or integrate it to your favourite accessory pattern.
Seam Allowances
Seams must be sewn at ¼ in. The ¼ in seam allowances are already included in the cutting instructions. Your final block should be 12 in x 12 in, which means 12½ in x 12½ in unfinished.
Materials Needed
To make this quilt block, you will need the following:
- A rotary cutter
- A cutting board
- A marking pen. My favorite is the cartridge pencil by Prym
- A basic ruler
- An imperial (in) quilting ruler
- A sewing machine
- Wonder clips or pins (here are my favourites for curves)
- 2 scissors: one for fabric & another for paper
- Quilt cotton
- Colour 1 (white): 25 cm (10 in)
- Colour 2 (pink): 15 cm (6 in)
- Colour 3 (blue): 15 cm (6 in)
- Colour 4 (green): 10 cm (4 in)
The table below illustrates the 3 models used to create this block.
|
Models |
Name | Abbreviation | |
 |
« Curve square » |
HSTS |
|
 |
« Half-square triangle» |
||
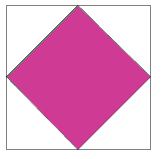 |
« Diamond in a square » |
– |
|
List of Cuts
First, download and print the pattern for pieces A & B .
Download free pattern
Leave us your email address to get the free pattern.
Cut your cottons :
Colour 1 (white)
- 20 x 2½ in squares (Piece C)
- 1 x 6 in square (Piece D)
- 4 pattern pieces (Piece A)
Colour 2 (pink)
- 4 x 4½ in square (Piece E)
Colour 3 (blue)
- 1 x 6 in square (Piece F)
- 4 x 2½ in square (Piece G)
Colour 4 (green)
- 4 pattern pieces (Piece B)
Here are the 3 techniques to create your block.
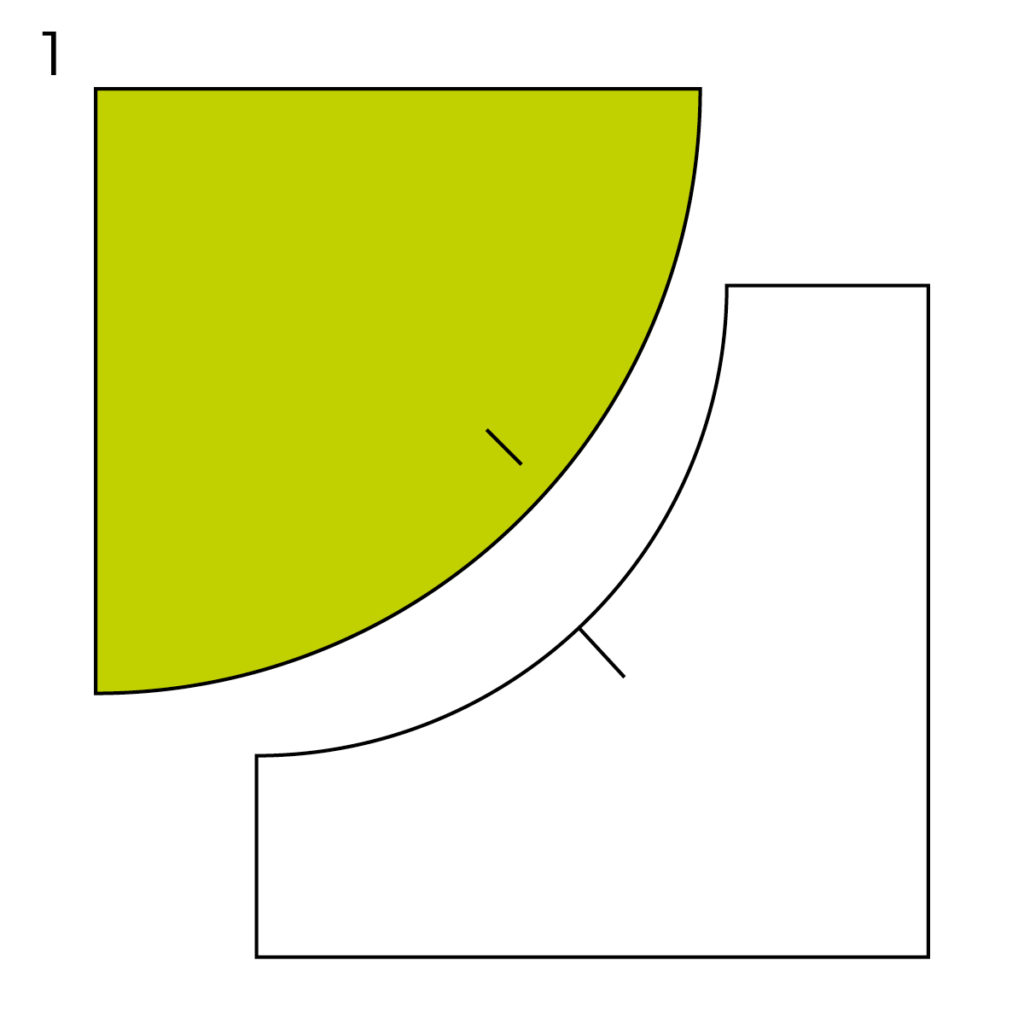
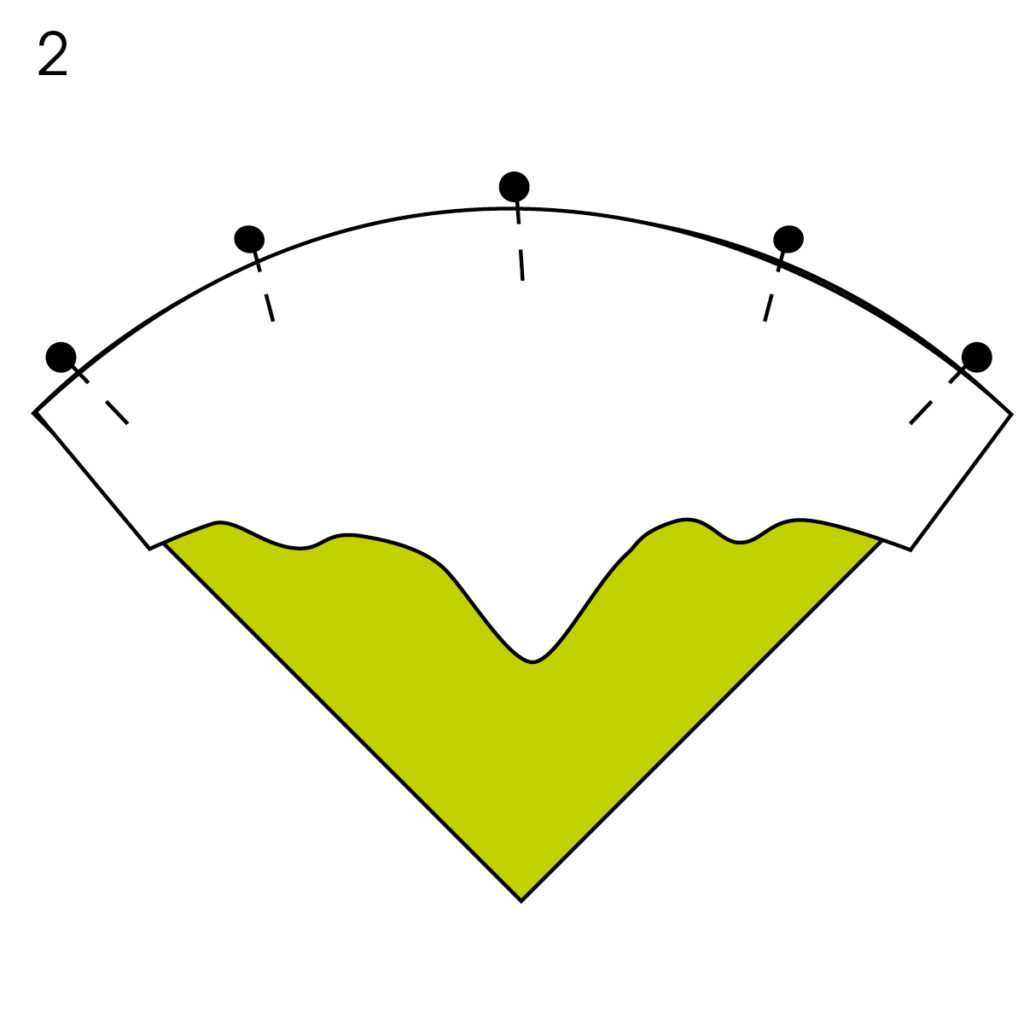
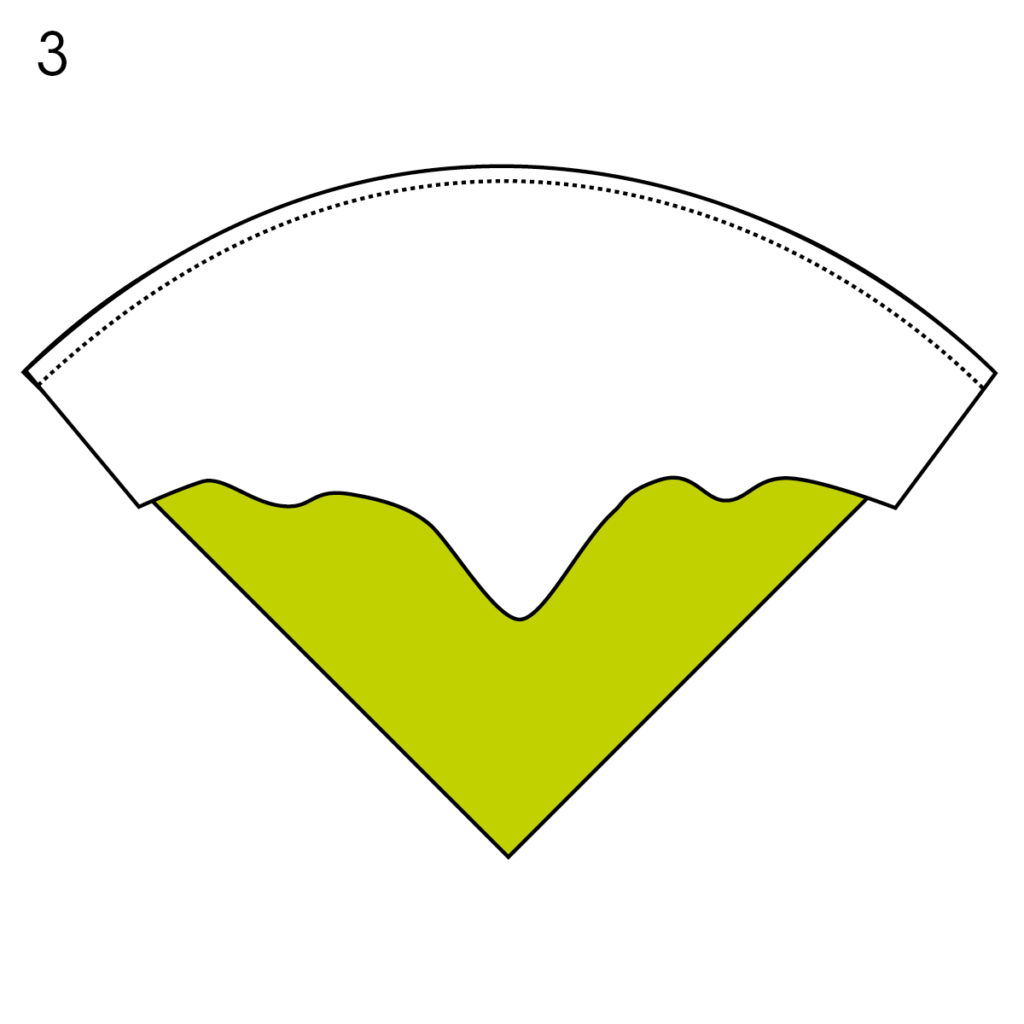
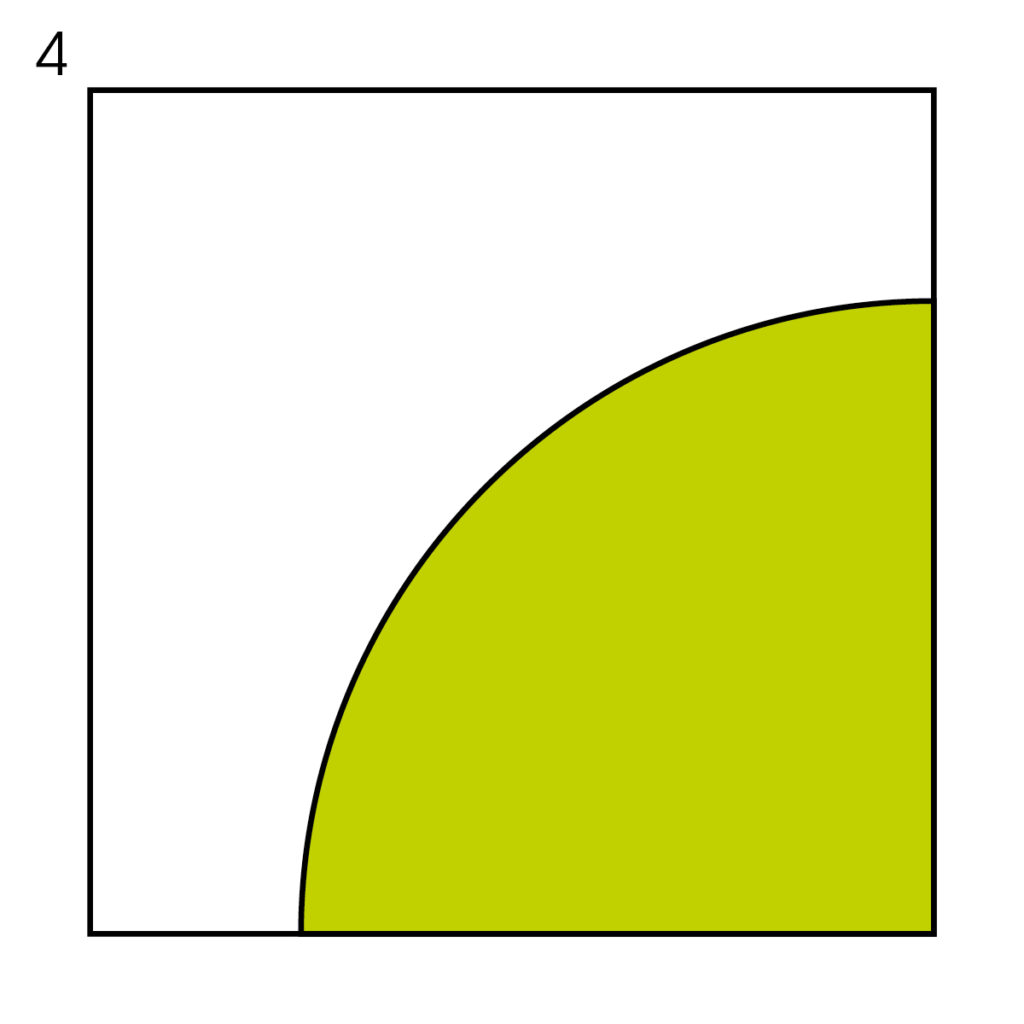
The Curve Square
Step 1 : Mark the centre of the curve on each piece by referring to the pattern (Pieces A & B);
Step 2: Pin the curve, spreading the fabric evenly;
Step 3: Sew the curve (quick tip: go slowly and stop often to make sure the fabric doesn’t crease. To avoid an irregular curved seam, make sure your needle is down if you need to lift up the hinged presser foot to reposition your fabric).
The Half-Square Triangle
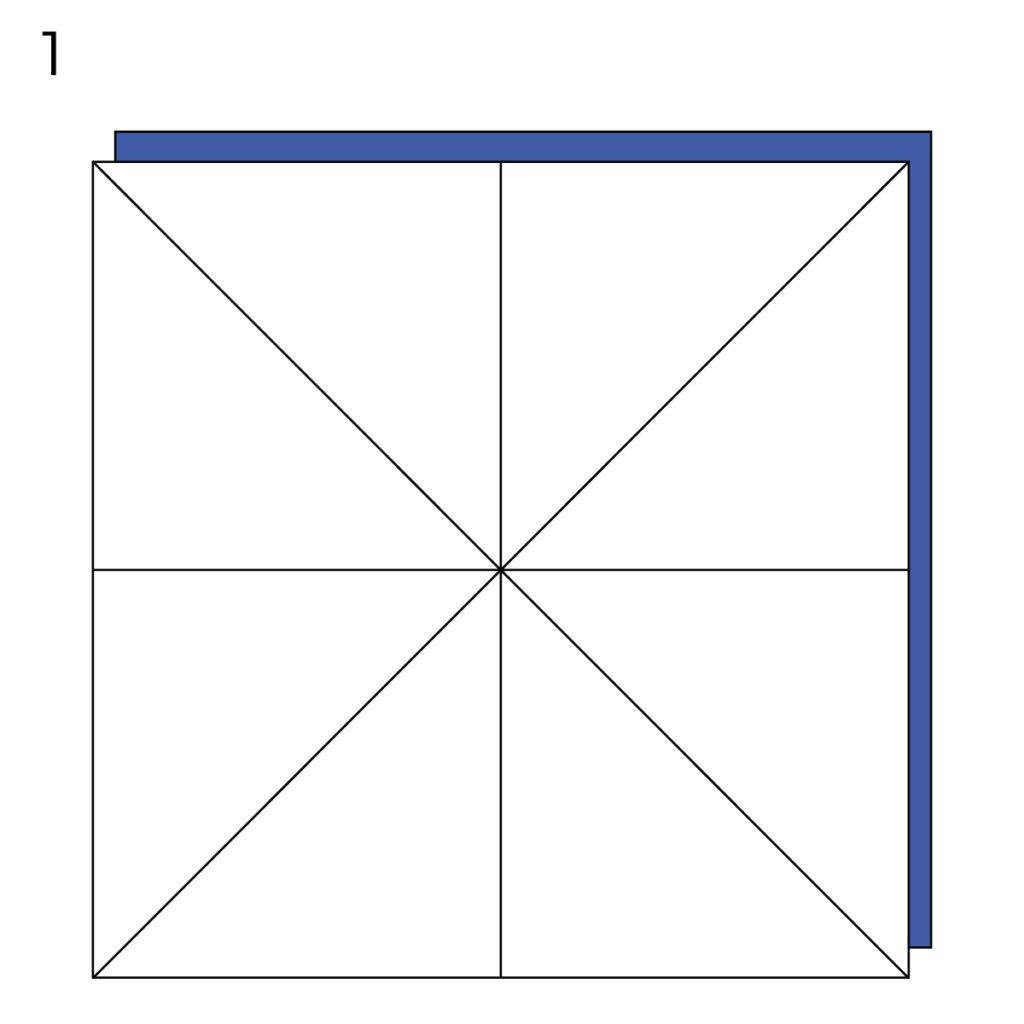
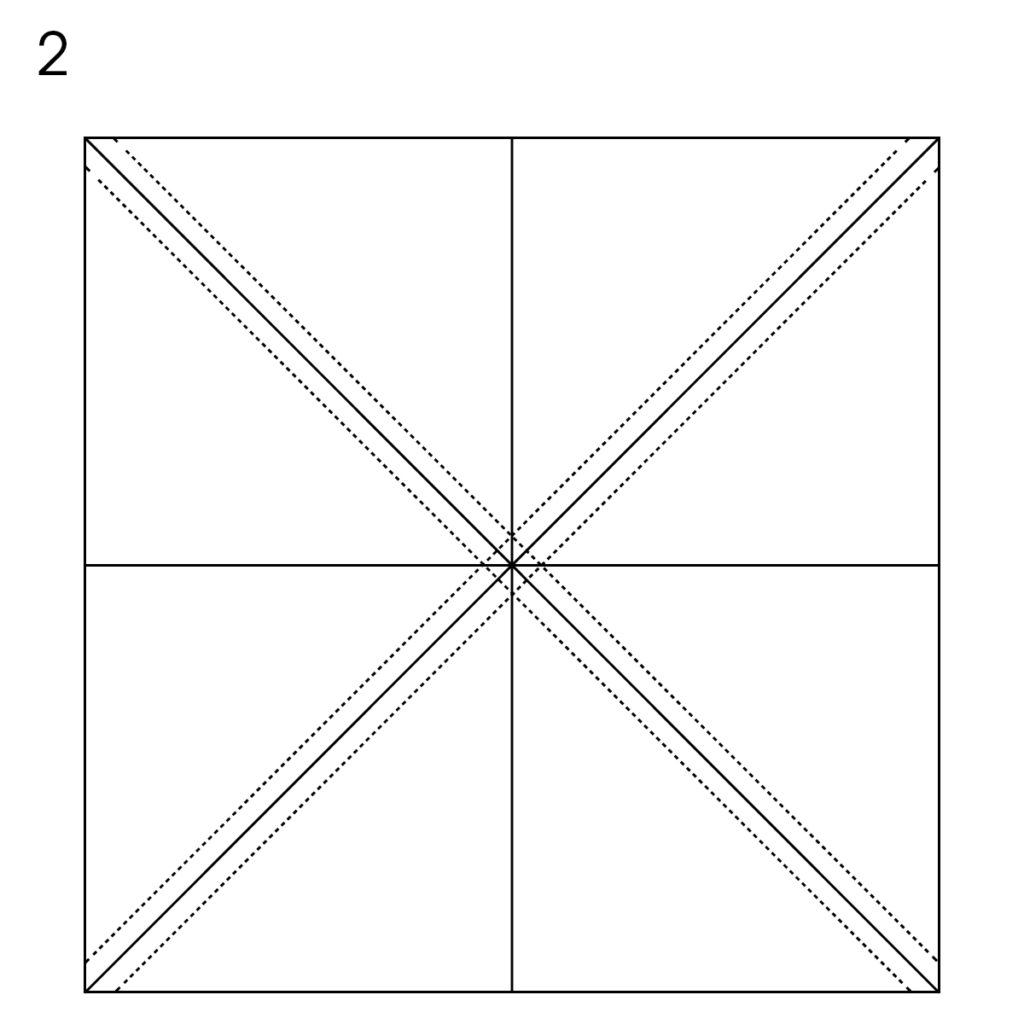
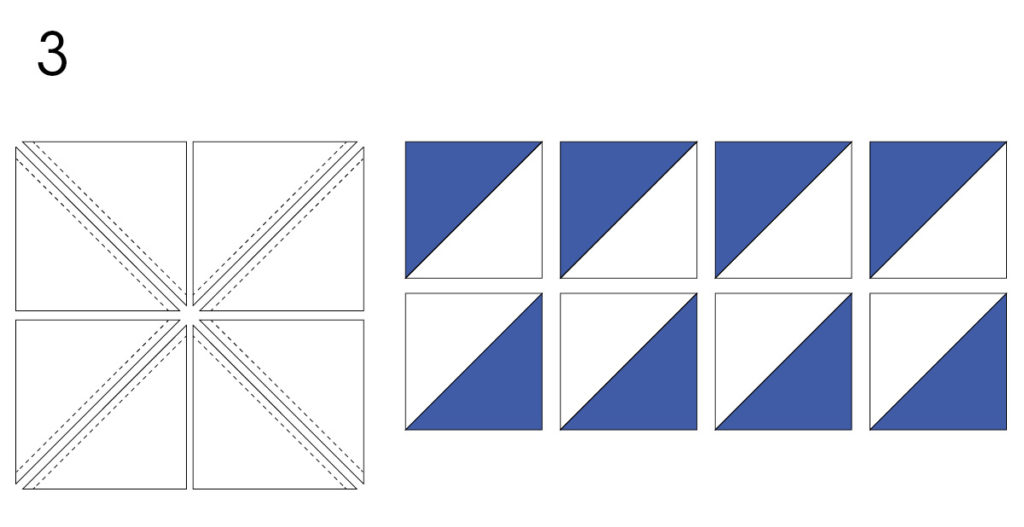
Here is a new technique to create 8 half-square triangles with 2 squares. A technique that helps keep a low fabric waste.
Step 1: Place the two squares (piece D & F) right sides together and mark the wrong side of your square, tracing two diagonals and a cross (as shown on the image);
Step 2: Sew ¼ in on either side of the two diagonals;
Step 3: Cut on the initial markings to make 8 half-square triangles;
Step 4: Using the quilting ruler or a Bloc Loc ruler, cut the 8 half-square triangles into 2½ in squares.
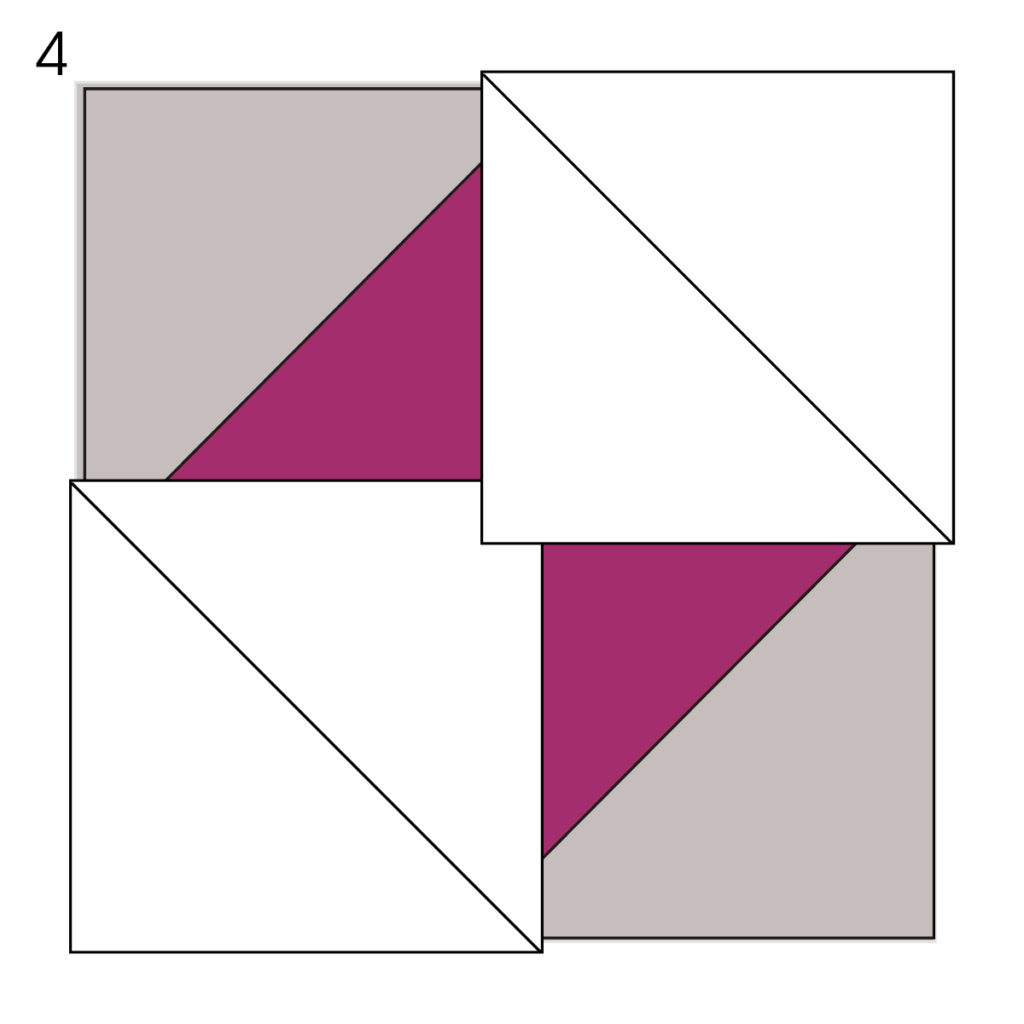
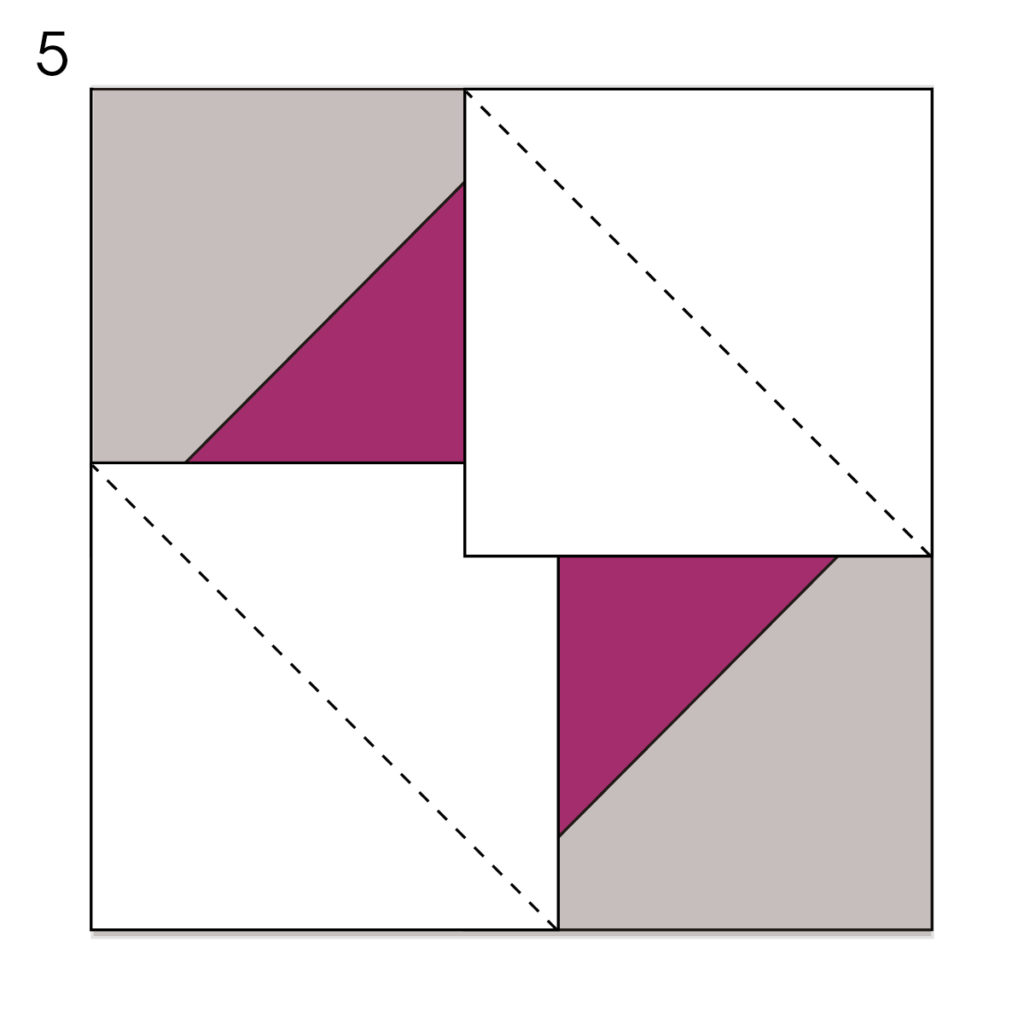
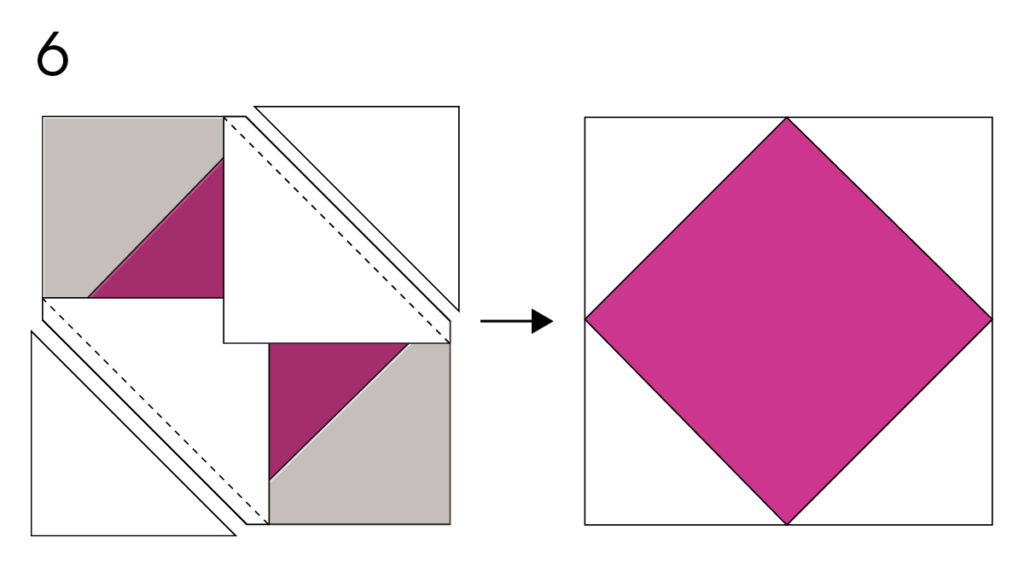
The Diamond in a Square
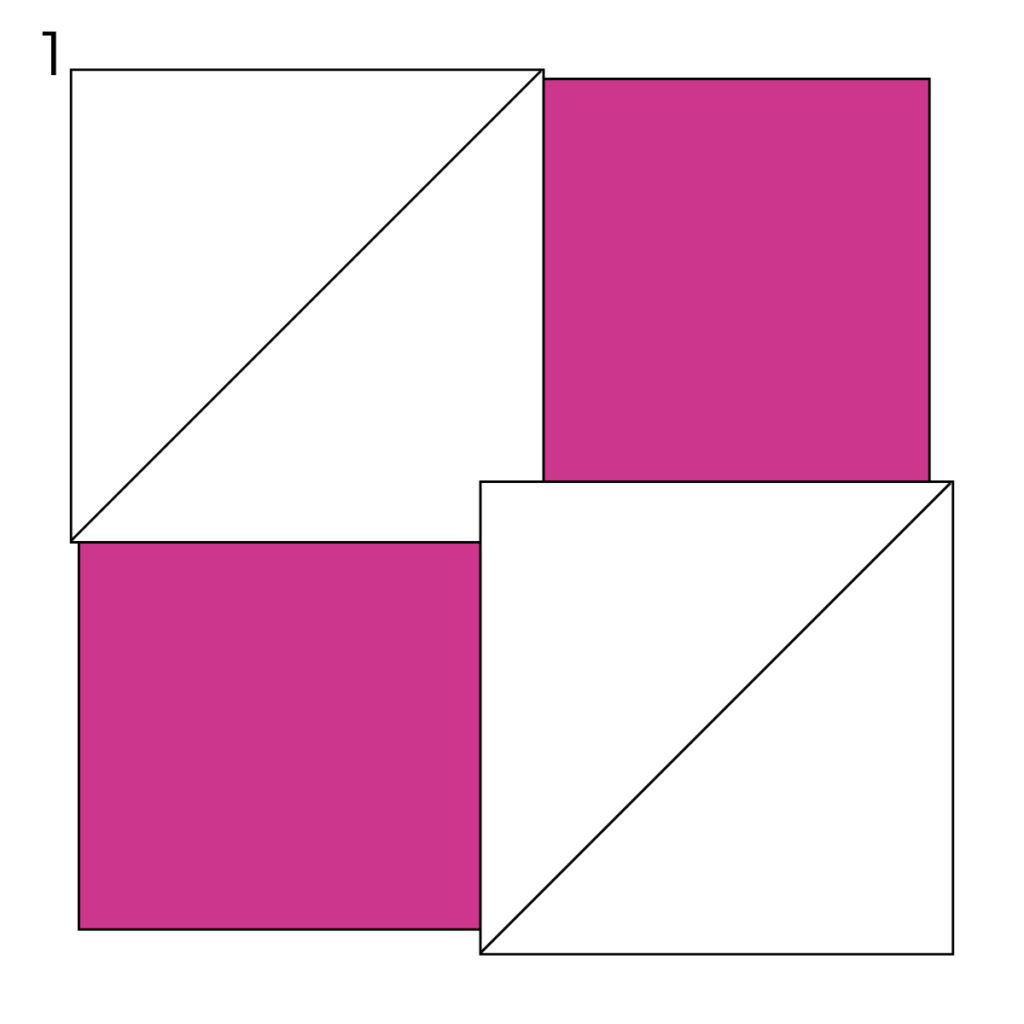
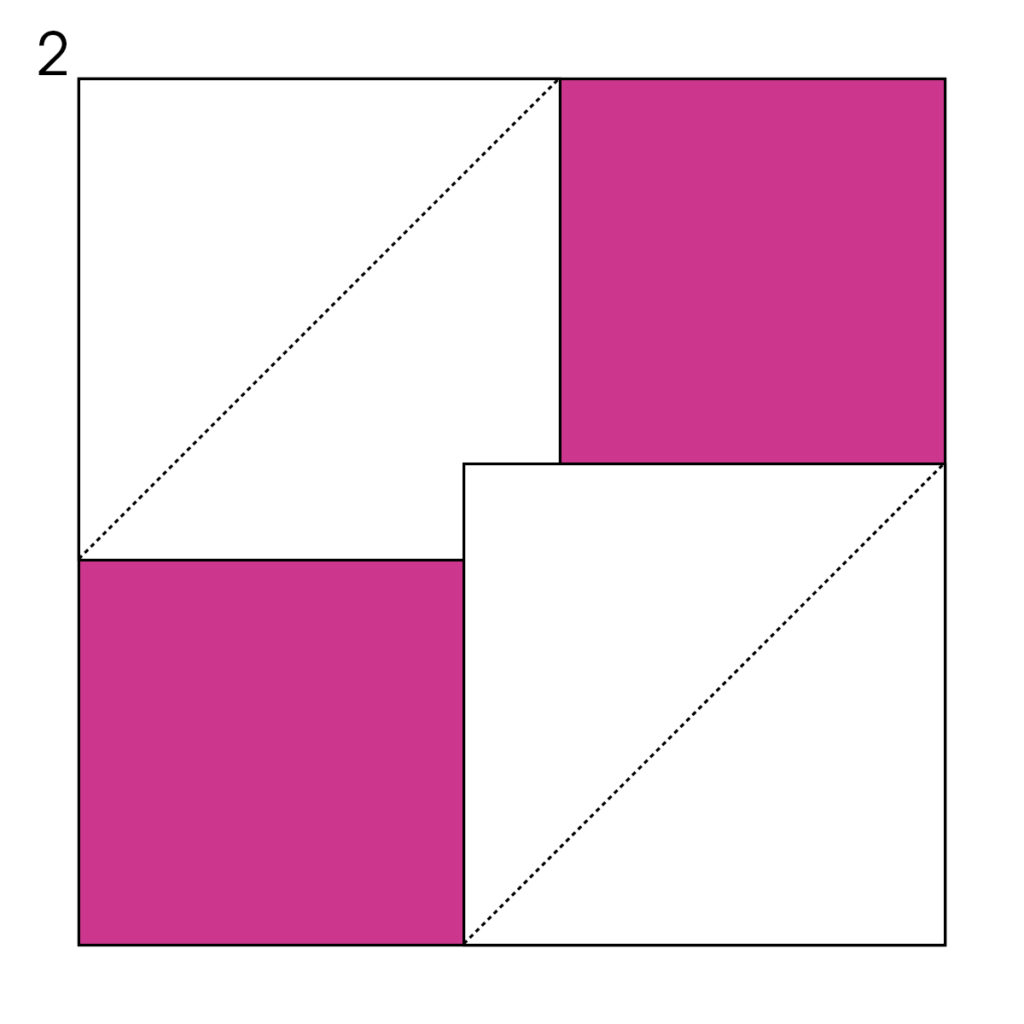
Step 1: Place right sides together two small squares (piece C) on two opposite corners of the large square (piece E) and mark the diagonals on the small squares;
Step 2: Sew the diagonals;
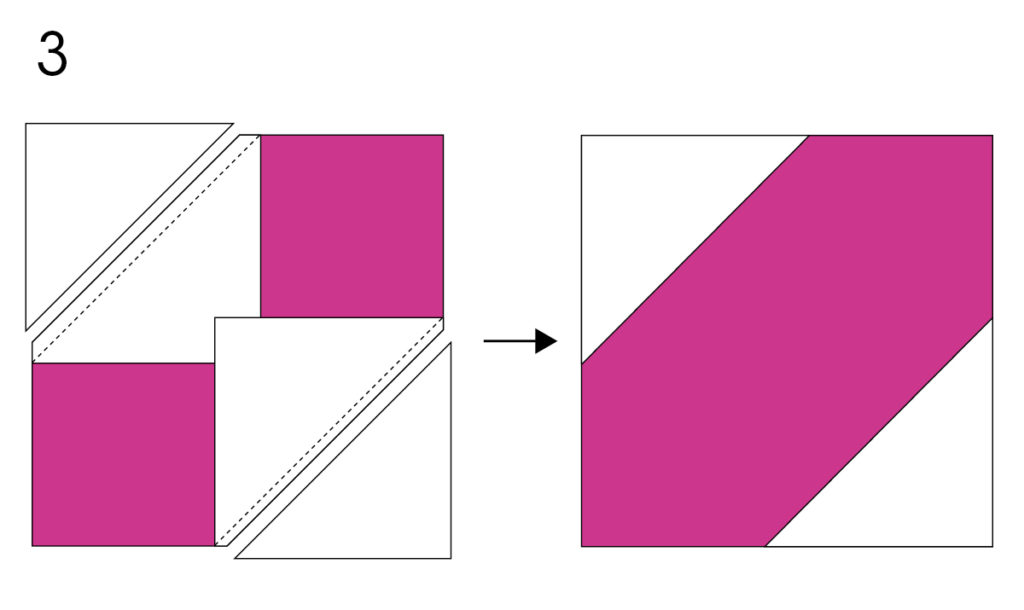
Step 3: Cut the excess ¼ in from the seam on the two corners and iron your corners to shape it back into a square;
Step 4: Now, place the two remaining small squares (piece C) on the two other corners and mark the diagonals;
Step 5: Sew the diagonals;
Step 6: Cut the excess ¼ in from the seam on the two corners and iron your corners to shape it back into a square.
Piecing
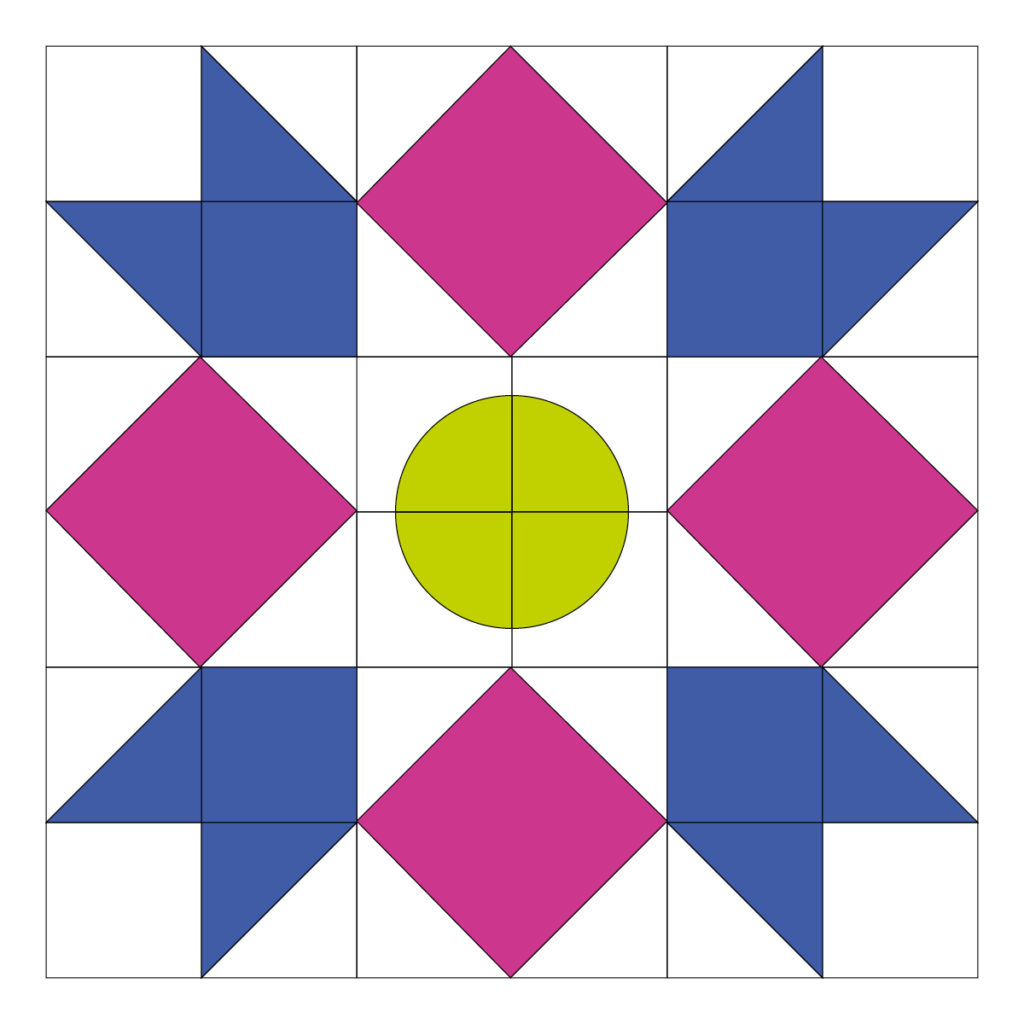
For the complete piecing of the block, follow the diagram below. I suggest making 9 blocks and then piecing them into stripes.
The Mini Quilt on Video
Available in french only
Gabrielle explains, one step at a time, how to create this block, and the 3 techniques used.
If you feel like it, share your own best picks, projects or discoveries sur on our various social media platforms using #clubtissus.


