Published on:
November 22, 2019
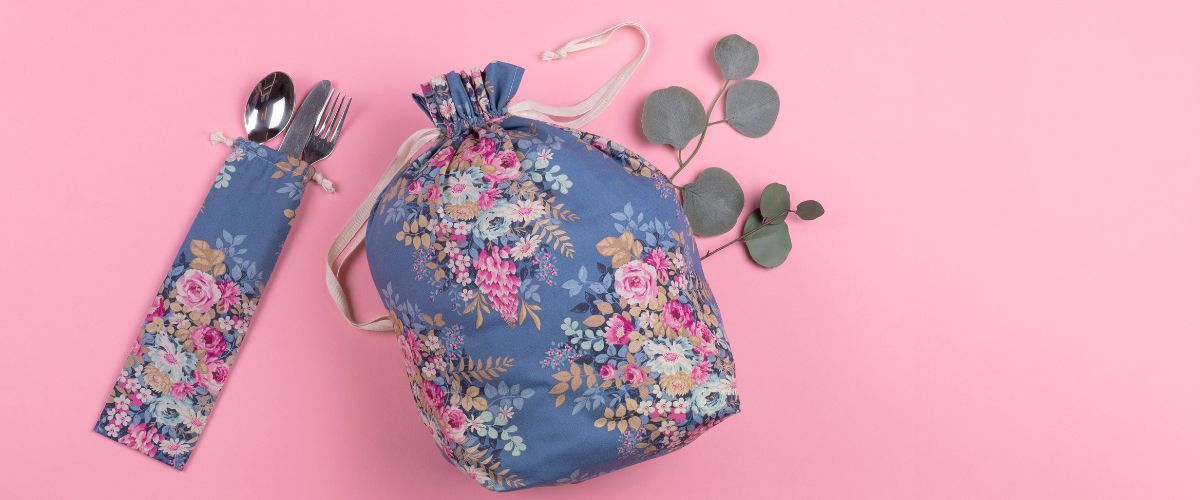
With its thousand and one uses, our new free drawstring bag pattern will allow you to make your life more ecologically friendly every day, one small gesture at a time.
One bag, multi purpose
Use the straw and utensil pattern to store your reusable dishes, and slip it in your purse for your next quick visit to the restaurant. This holiday season, use them to wrap your gifts and reuse them every year to avoid filling your trash cans with wrapping paper. Ditch the plastic bulk bags and bring your new drawstring bags on your next trips to the local grocery store to fill it with flour or even candy!Two versions
Our drawstring bag is available in two versions, either a simple bag with a single drawstring or a bag with a flat bottom and gathered drawstring. To allow you to vary the sizes and adjust the model according to the treasure you’ll be adding inside, we have created a table that will allow you to create your own bag according to your measurements!Here are other zero waste projects that will help you waste (a little) less!
- Reusable fruits and vegetables produce bags
- Reusable snack bags
- Makeup remover pads
- The perfect bag (in French only)
- The shoe string bag (in French only)
Level of difficulty : Easy. Basic sewing machine skills required.
Time required : About an hour
Sewing value included: 1 cm (3/8 in)
Formats
| Models | Width | Height (Excluding the passer-by) | Thickness |
| Model A For straws and utensils | 8 cm (3 in) | 27 cm (10 5/8 in) | - |
| Model B For gift cards | 7.5 cm (3 in) | 10.5 cm (4 in) | - |
| Model C For bulk buying | 15 cm (6 in) | 23 cm (9 in) | - |
| Model D Small gift bag | 15 cm (6 in) | 20 cm (7 7/8 in) | 10 cm (4 in) |
| Model E Medium gift bag | 20 cm (7 7/8 in) | 25 cm (10 in) | 15 cm (6 in) |
| Model F Large gift bag | 25 cm (10 in) | 30 cm (11 ¾ in) | 20 cm (7 7/8 in) |

Model A-B-C

Model D-E-F
Download free pattern
Leave us your email address to get the free patterns.
Download free pattern
Leave us your email address to get the free pattern.
In order to make a greener project and since the pieces are quite easy to create, we recommend that you do not print the pattern, except the triangle on the last page, in order to avoid wasting paper.
Required material :
- Lightweight fabric (ex. : quilting cotton)
- Model A for straws and utensils : 60 cm (23 5/8 in)
- Model B for gift cards : 30 cm (11 ¾ in)
- Model C for bulk buying : 60 cm (23 5/8 in)
- Model D small gift bag : 85 cm (33 1/2 in)
- Model E medium gift bag : 1.05 m (41 ½ in)
- Model F large gift bag : 1.25 m
- Ribbons with a 1 cm (3/8 in) width
- Model A for straws and utensils : 50 cm (19 ¾ in)
- Model B for gift cards : 50 cm (19 ¾ in)
- Model C for bulk buying : 85 cm (33 1/2 in)
- Model D small gift bag : 1.2 m (47 ¼ in)
- Model E medium gift bag : 1.6 m (63 in)
- Model F large gift bag : 2 m (78 3/4 in)
What you need to cut :
- A rectangle in the format and model of your choice (Height/sense of the grain x Width)
- Model A for straws and utensils : 60 cm (23 5/8 in) x 10 cm (4 in)
- Model B for gift cards : 27 cm (10 5/8 in) x 9.5 cm (3 3/4 in)
- Model C for bulk buying : 52 cm (20 1/2 in) x 17 cm (6 ¾ in)
- Model D small gift bag : 84 cm (33 in) x 27 cm (10 5/8 in)
- Model E medium gift bag : 104 cm (41 in) x 37 cm (14 ½ in)
- Model F large gift bag : 124 cm (48 3/4 in) x 47 cm (18 ½ in)
and
- 2 strings of (2 x width of pattern) + 5 cm (2 in)
- Model A for straws and utensils : 25 cm (10 in)
- Model B for gift cards : 25 cm (10 in)
- Model C for bulk buying : 40 cm (15 ¾ in)
- Model D small gift bag : 60 cm (23 5/8 in)
- Model E medium gift bag : 80 cm (31 ½ in)
- Model F large gift bag : 100 cm (40 in)
Model A-B-C
STEP 1: If your fabric tends to fray, we recommend that you serge around your piece for a nice finish.
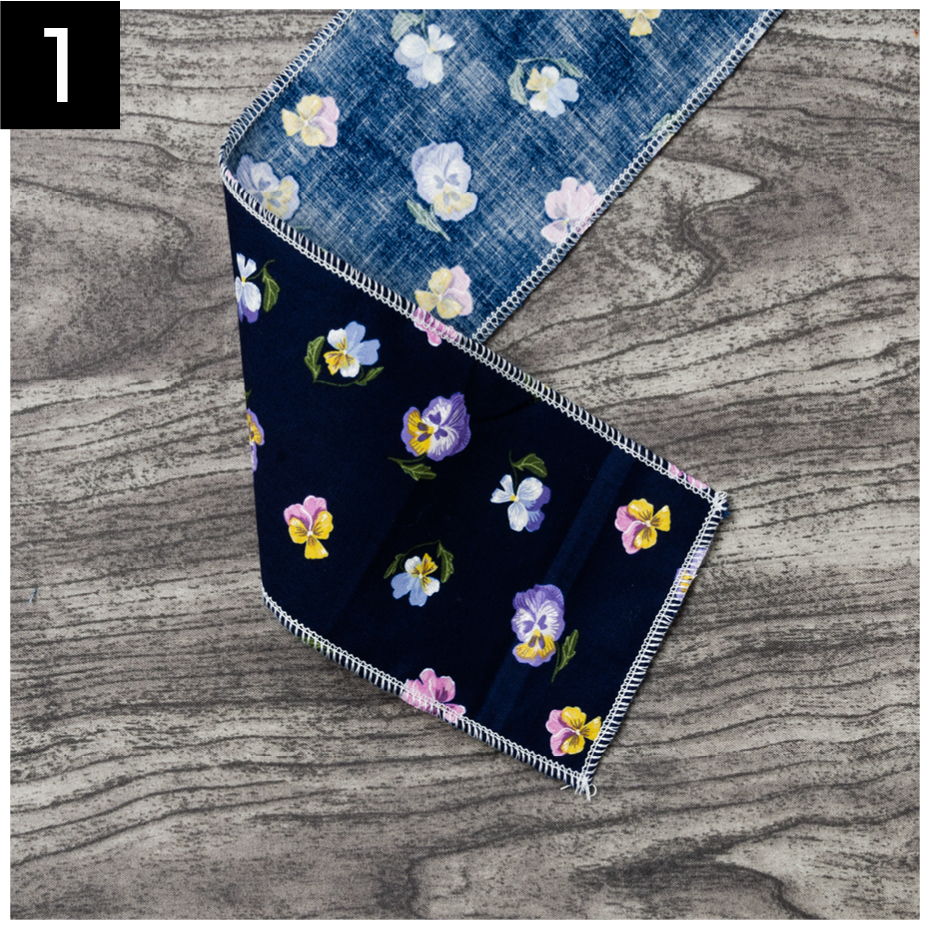
STEP 2: Fold the large rectangle in half, right sides together, and sew both sides, stopping at the notch, at 3 cm (1 1/4 in).
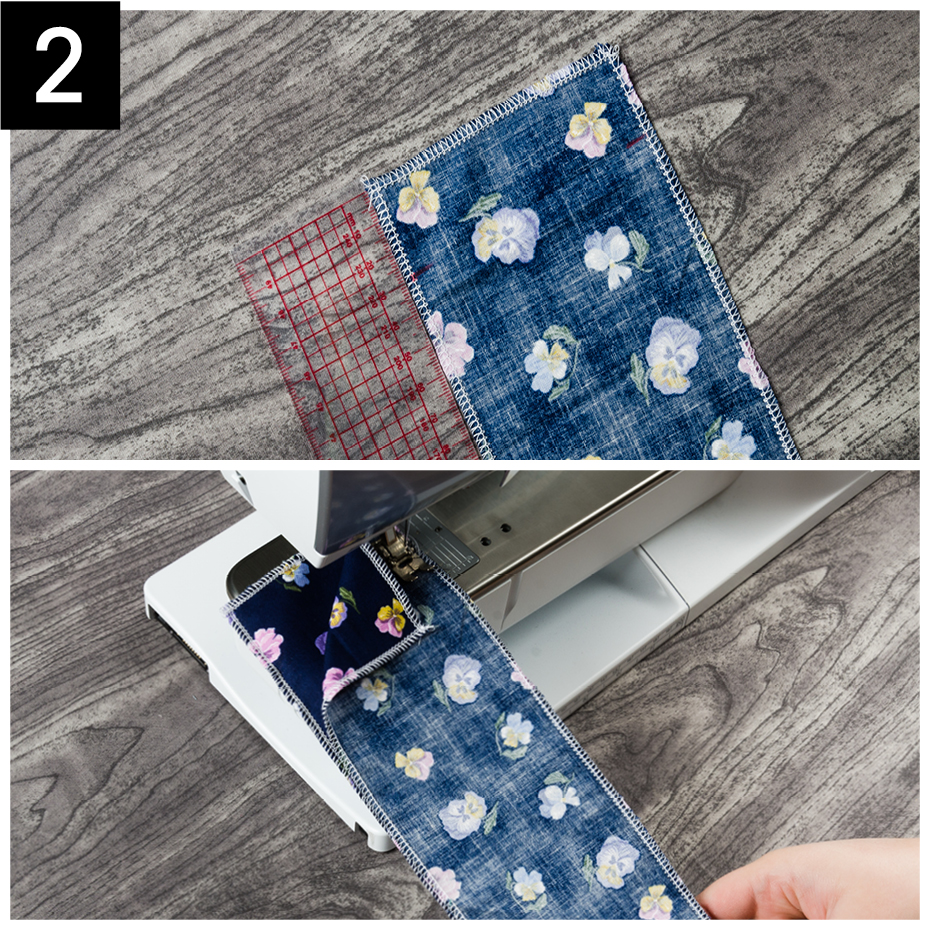
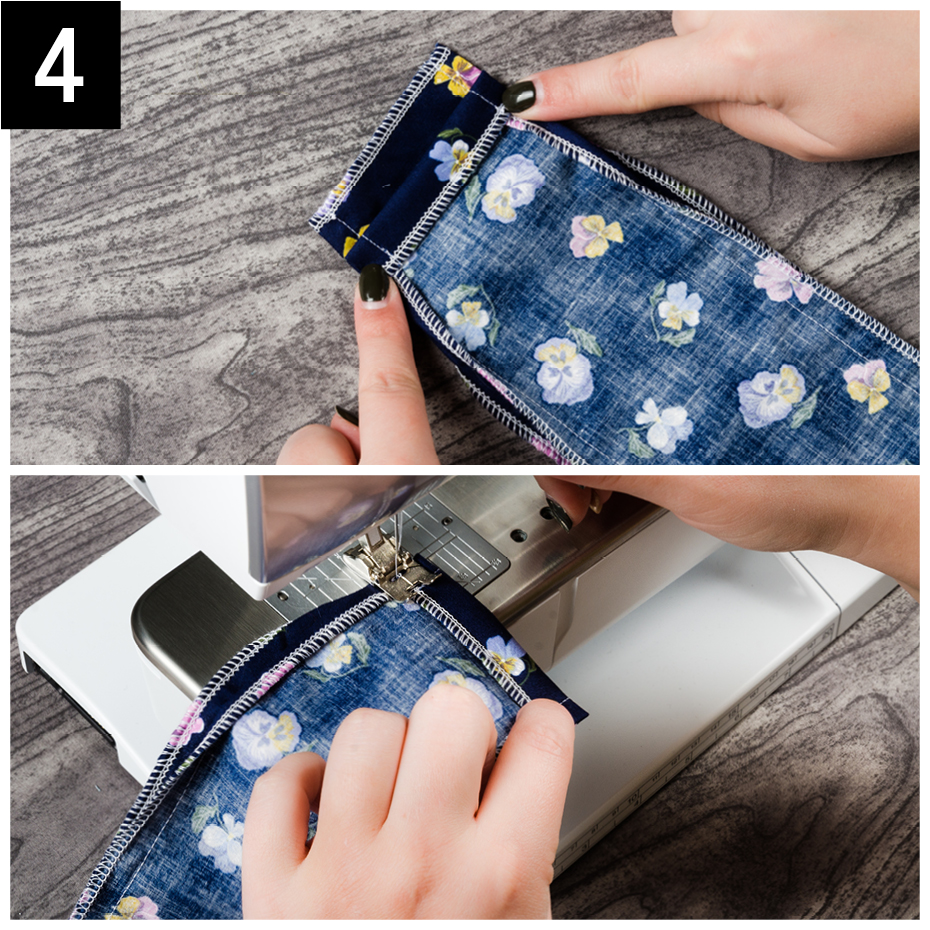
STEP 3: Fold the rest in the side on the 4 corners of the bag following the seam allowance. Topstitch to create the finish of the loop.
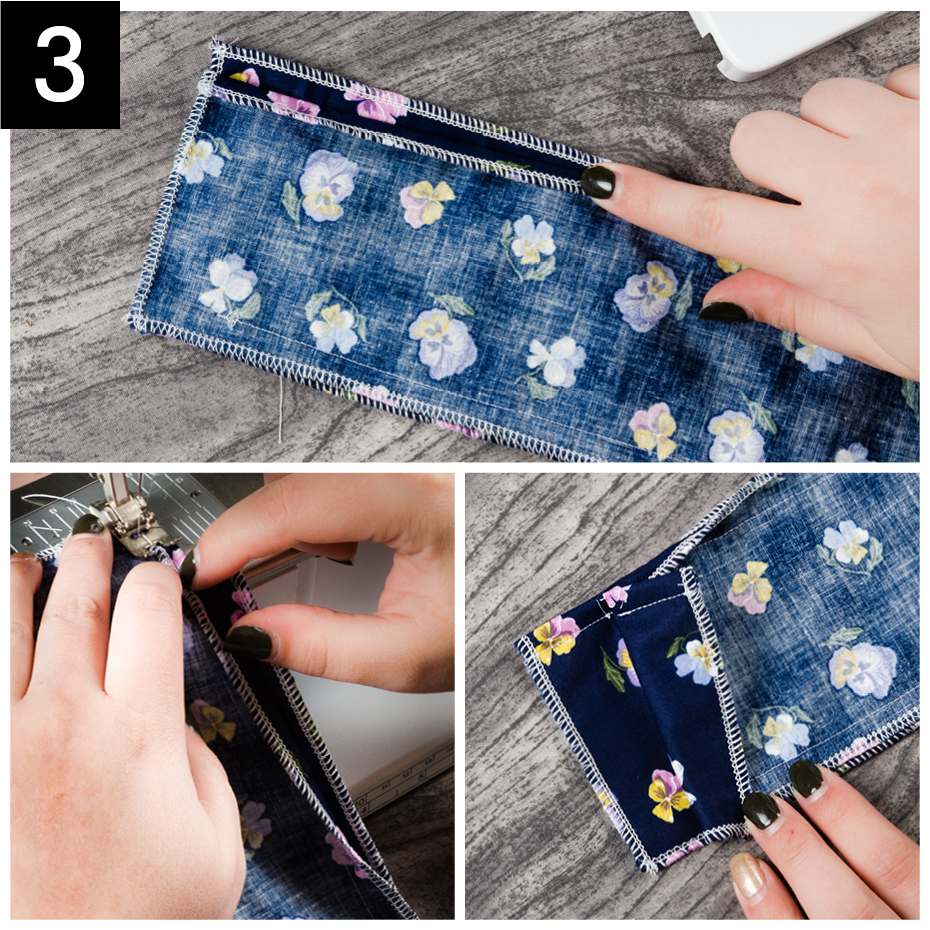
STEP 4: Fold the edge of the bag on each side, bringing the edge up to the notch, to create the loops. Topstitch in the center of your overlock.
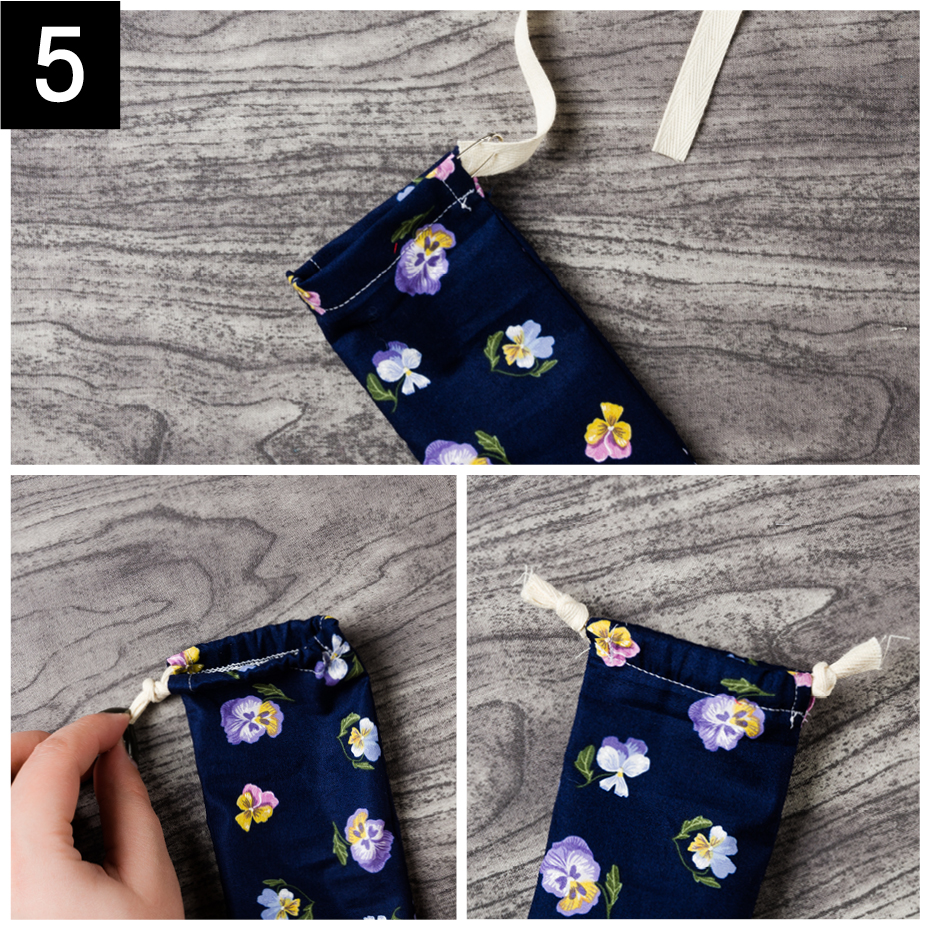
STEP 5: Pass the strings through each of the loops and tie a knot to join the two ends. Repeat the step twice so that you have a knot on each side of your bag.
Model D-E-F
STEP 1: If your fabric tends to fray, we recommend that you serge around your piece for a nice finish.
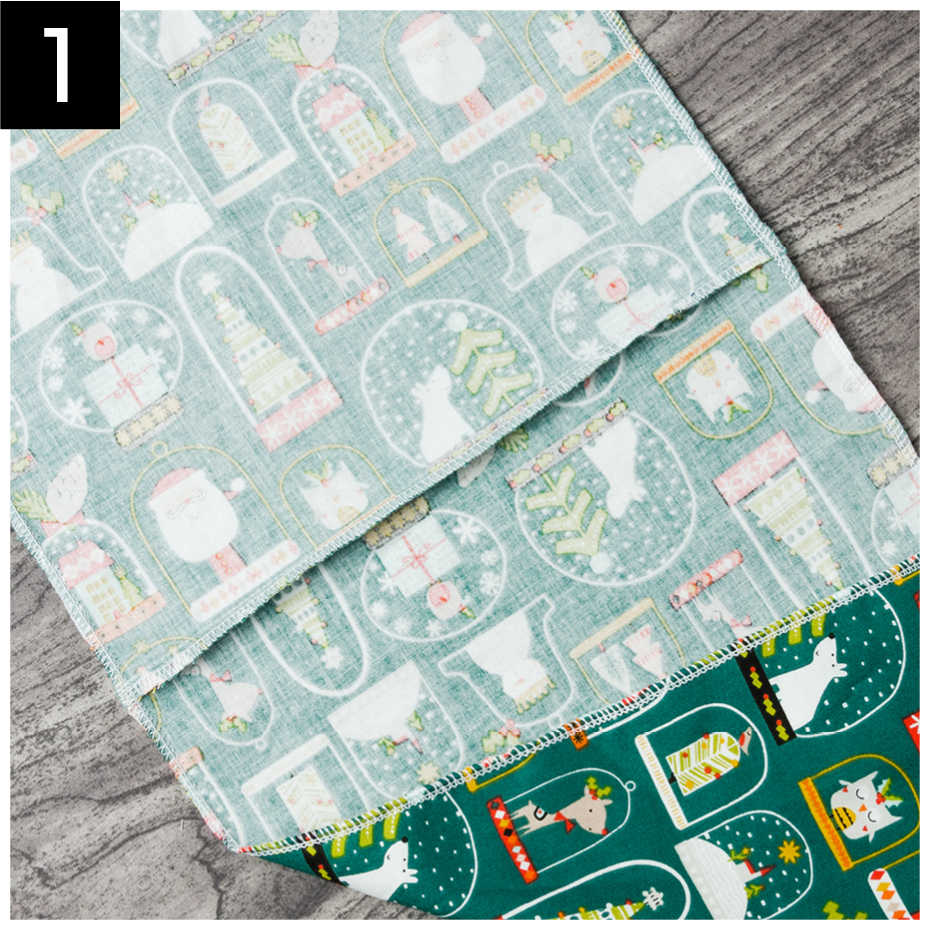
STEP 2: Fold the large rectangle in half, right sides together, and sew both sides, stopping at the notch, at 12 cm (4 ¾ po).
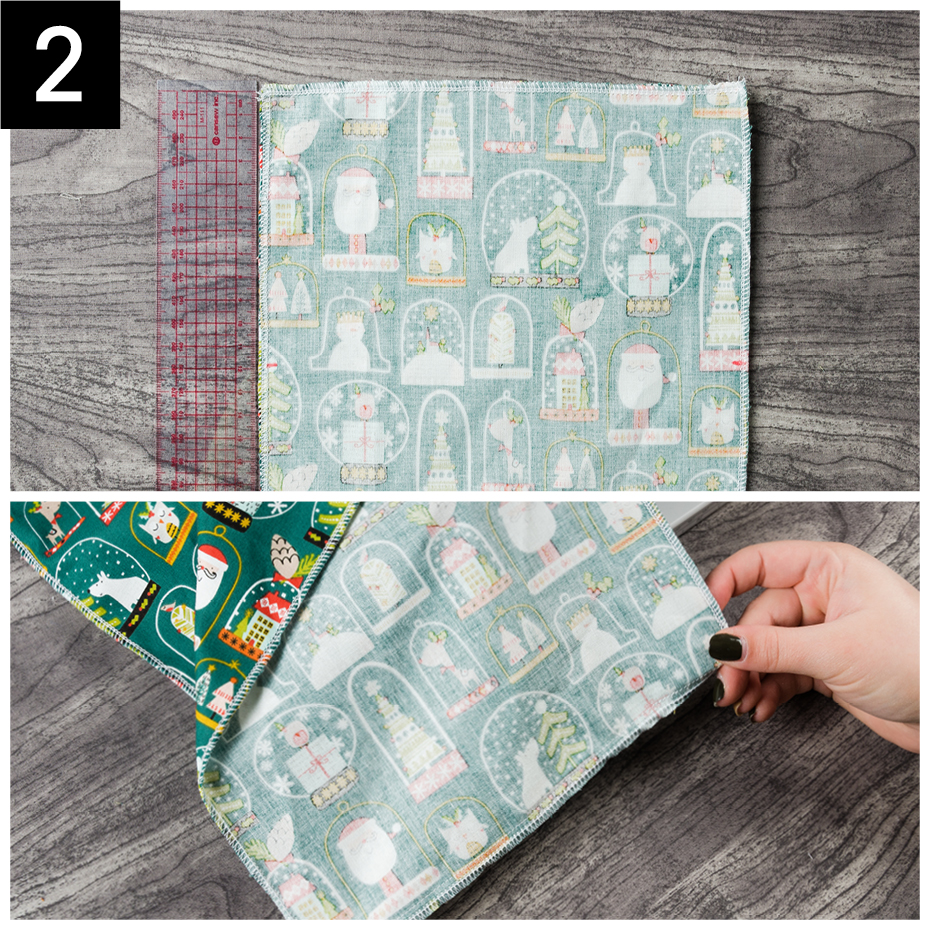
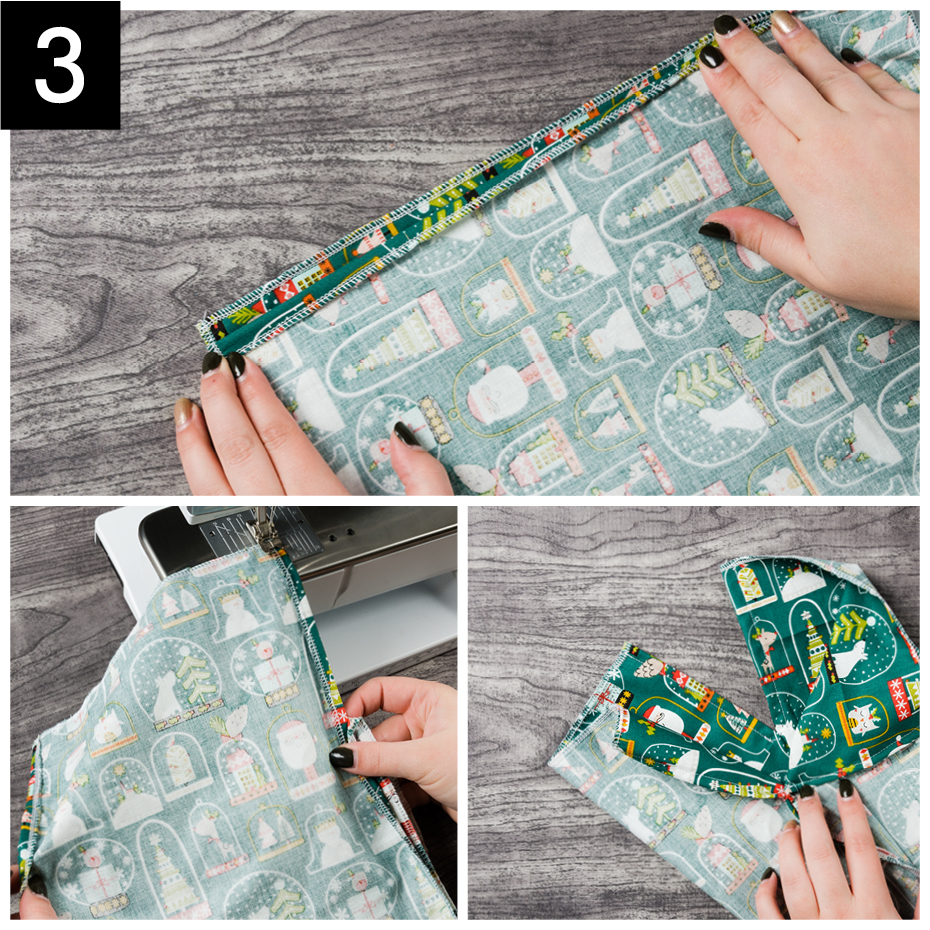
STEP 3: Fold the rest in the side on the 4 corners of the bag following the seam allowance. Topstitch to create the finish of the loop.
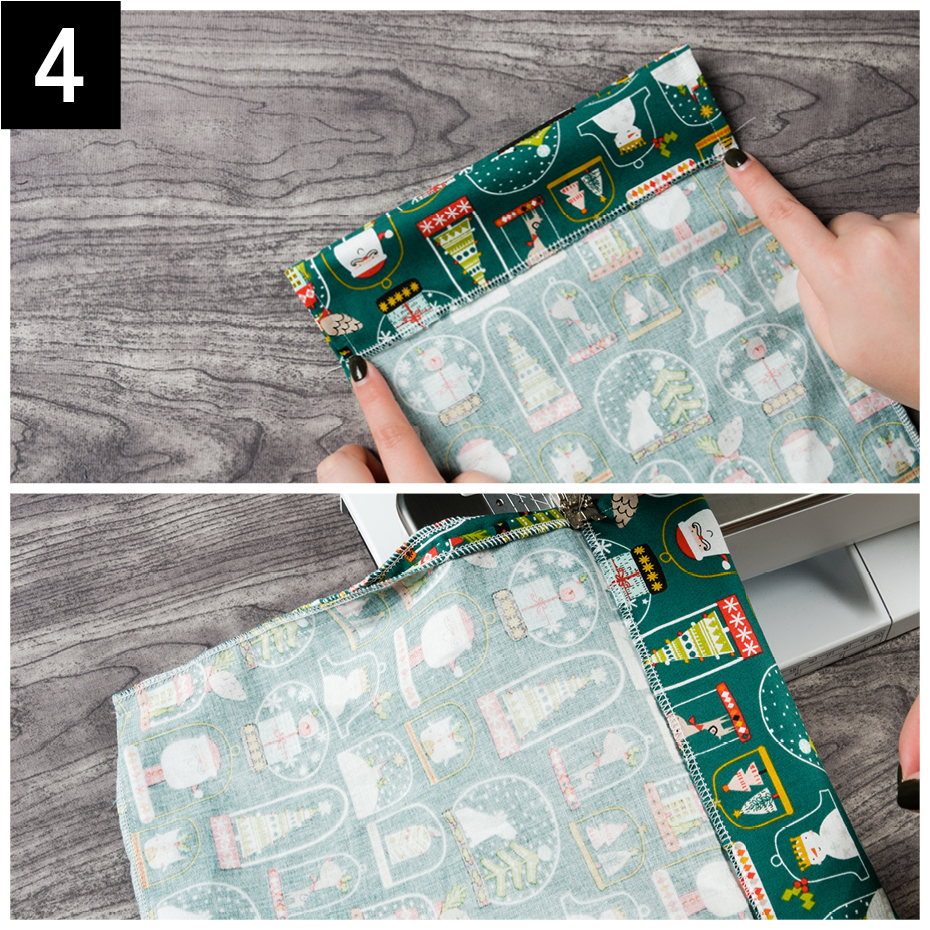
STEP 4: Fold the edge of the bag on each side, bringing the edge up to the notch, to create the loops. Topstitch in the center of your overlock.
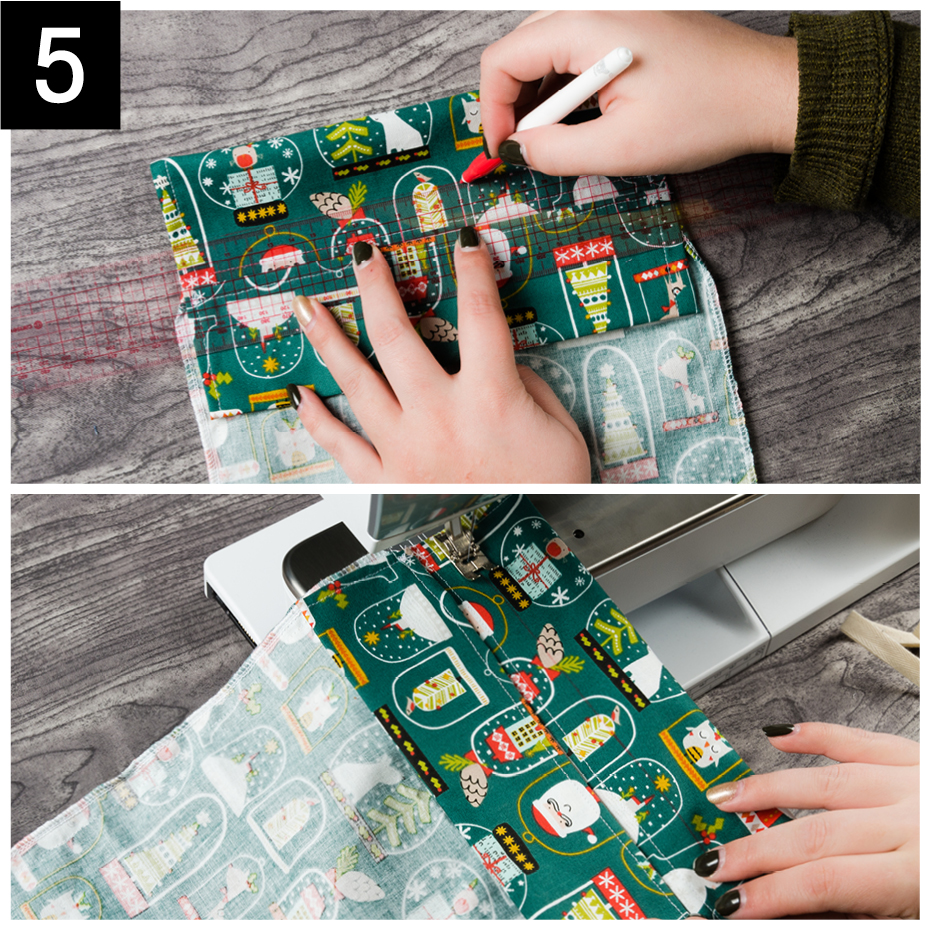
STEP 5: Sew another topstitch at 1.5 cm (½ inch) higher than the first. We recommend that you use an iron-erasable marker to draw your line to follow.
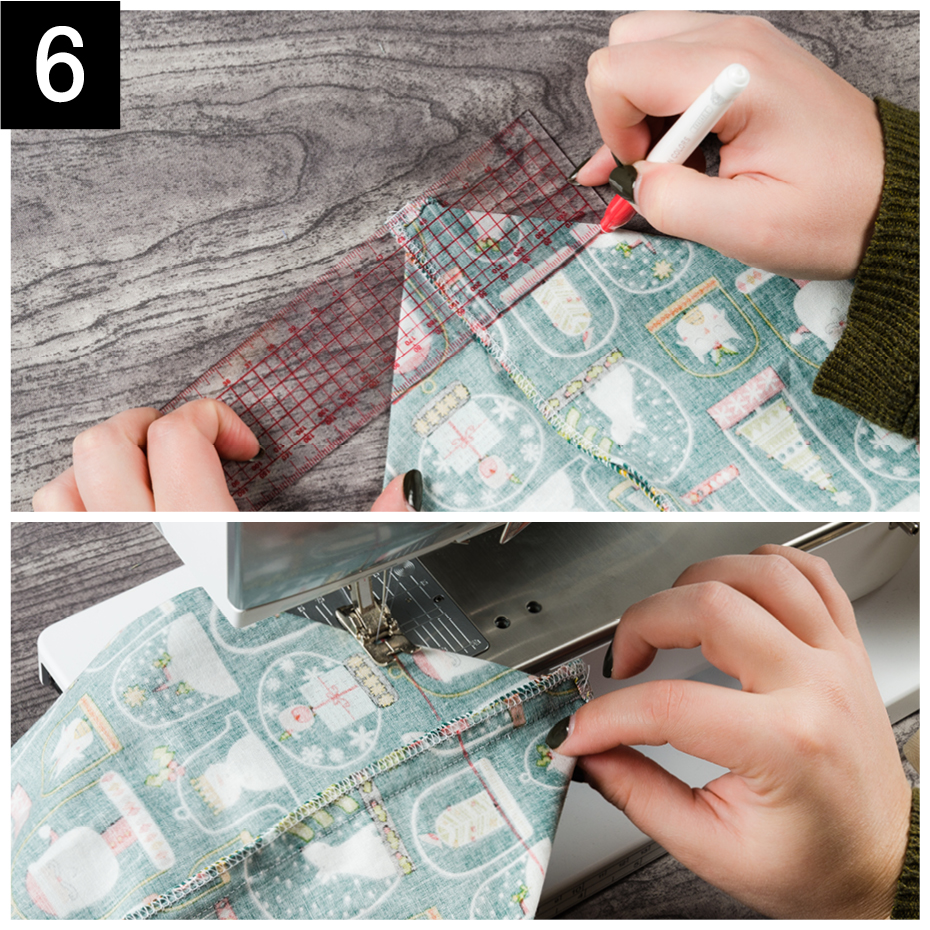
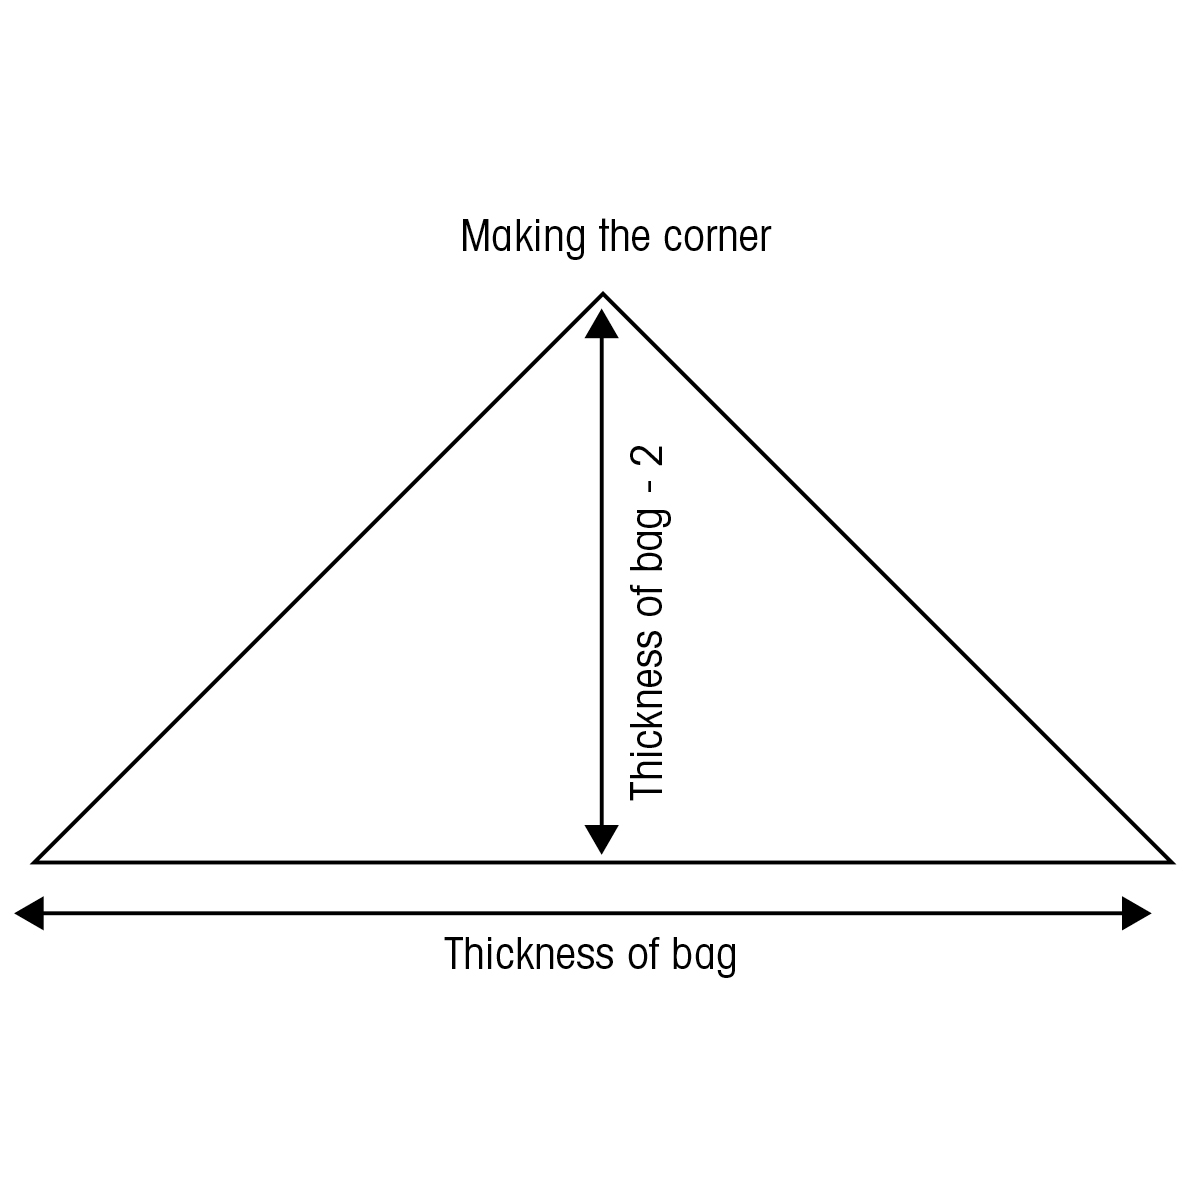
STEP 6: Make the corners, making sure you have the same distance on each side of the seam. Refer to the dimension table to know where to sew your topstitching. We recommend that you use an iron-erasable marker to draw your line to follow. You can then serger your corner to finish the corner perfectly.
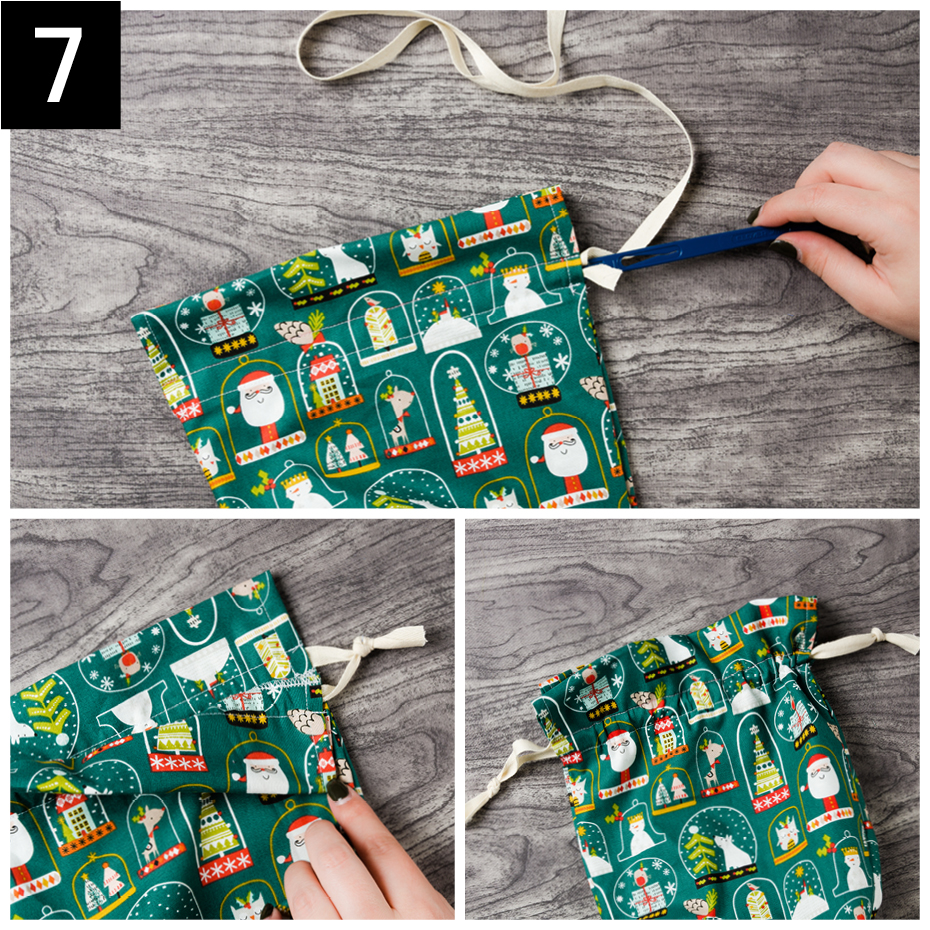
STEP 7: Pass the strings through each of the loops and tie a knot to join the two ends. Repeat the step twice so that you have a knot on each side of your bag.
Feel free to share them with us through social media, using the hashtag #clubtissus.
Comments
Leave a comment
Loading...

